
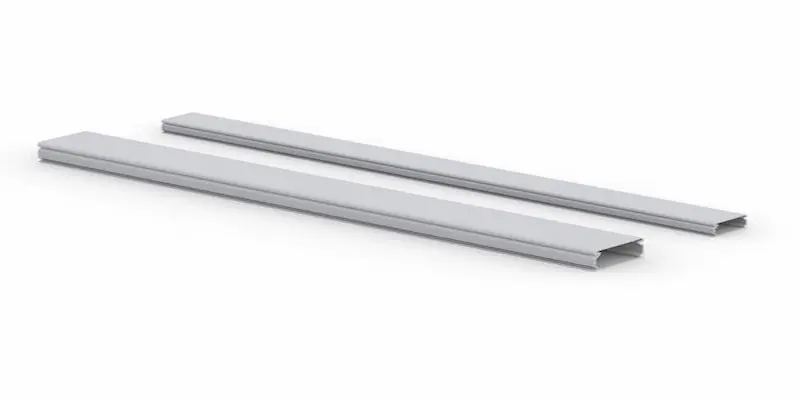
A plastic cable raceway can turn exposed cords into a cleaner, easier-to-manage route without opening finished walls. Yet choosing one is not as simple as matching the channel color to the room. The profile, internal capacity, mounting method, fittings, and cable movement all affect how well the system performs.
This guide is designed for facility managers, IT teams, office planners, installers, and property owners who need surface cable management for desks, displays, wall-mounted equipment, or shared work areas. It explains how to compare profiles, calculate capacity, plan corners, and prepare for future changes.
The right solution should organize cables without crushing them, blocking connectors, or making maintenance difficult. By planning the full route before ordering, you can reduce unnecessary cuts, mismatched fittings, loose covers, and undersized sections.
What Is a Plastic Cable Raceway?
A plastic cable raceway is a surface-mounted channel that guides and conceals wires along a wall, desk, baseboard, cabinet, or equipment support. Most systems include a base that attaches to the surface and a removable or hinged cover that closes over the cable bundle.
Manufacturers offer raceways in several plastic materials, including PVC and other engineered polymers. Material properties vary, so buyers should review the product documentation for approved cable types, temperature limits, indoor or outdoor use, cleaning compatibility, and any relevant listing information.
Plastic raceway is popular because it is lightweight, easy to cut, available in low-profile shapes, and often supplied with matching corners and connectors. However, a decorative cord cover for wall use is not automatically suitable for every electrical application. Always select a product rated for the cables and environment involved.
Plastic Raceway Profiles and Configurations
Profile shape affects appearance, capacity, bend space, and access. A slim channel may disappear beside trim, while a deeper profile can carry more cables and accommodate larger connectors. Compare the usable internal dimensions rather than relying only on the outside measurements.
Low-Profile and Rounded Channels
Low-profile channels work well for a small number of power, network, USB, or display cables. Rounded covers create a softer appearance and may reduce sharp visual lines in offices, classrooms, and public-facing areas. Their limited depth, however, can make connector routing difficult.
Rectangular and High-Capacity Profiles
Rectangular channels provide more usable space and a flatter base. They often suit workstation clusters, equipment rooms, and longer cable routes. Some designs use a snap-on lid, while others use a hinged cover that stays connected during maintenance.
Divided and Multi-Compartment Systems
A divided PVC cable raceway uses internal barriers to organize separate cable groups. This can simplify identification and may support applications that require separation. Still, the system must be approved for the intended cables, and installation must follow product instructions and applicable requirements.
When the route serves displays or equipment attached to wall-mounted systems, choose a profile that leaves room around mounting plates, adjustment points, and service panels. The raceway should guide cables to the equipment without blocking movement or ventilation.
How to Match Raceway Size to Cable Quantity
Cable count is only a starting point. Raceway capacity depends on each cable’s outside diameter, connector size, stiffness, bend requirements, and the space consumed by fittings. A channel that holds six thin data cables may not hold two thick power cords with molded plugs.
Use this planning process before selecting a size:
1. List every cable that will enter the raceway, including adapters, display leads, charging cords, and expected future additions.
2. Measure or confirm the outside diameter of each cable and identify the largest connector that must pass through an opening.
3. Compare the bundle with the manufacturer’s usable internal width and depth, not just the product’s outside dimensions.
4. Check elbows, tees, couplers, and exit fittings because these components may have less usable space than a straight section.
5. Leave practical working room so the cover closes without force and technicians can add or remove cables later.
Do not compress the cable bundle to make an undersized channel work. Tight packing can create sharp bends, place pressure on connectors, and make the cover difficult to secure. A modest capacity margin also supports equipment changes without requiring a complete replacement.
Connector access matters as much as channel volume. If a large plug cannot pass through the planned entry or exit, you may need a larger fitting, a split opening, or a route that allows the cable to enter before the equipment is connected.
Best Raceway Options for Offices and Workstations
Office cable routes often combine fixed walls, adjustable furniture, monitor supports, power strips, and equipment that changes over time. The best profile depends on whether the cable section remains stationary or must accommodate movement.
Standing Desks and Adjustable Work Surfaces
For office standing desks, use the raceway to organize the fixed portion of the route. Then provide a controlled service loop or compatible flexible management section that supports the full height range without pulling on plugs.
Test the desk at its lowest and highest positions before finalizing cable length. Keep loops away from moving legs, pinch points, and floor traffic. The raceway should reduce loose cable, not restrict the desk’s movement.
Monitor Stations and Shared Desks
A raceway can guide power and signal cables toward monitor arms while keeping the desktop clear. Leave enough slack at each arm so users can adjust height, depth, and rotation without stressing the connections.
For shared workstations, label important runs and keep the cover accessible. Frequent device changes are easier when technicians can reopen the channel without moving the entire desk or display system.
Mobile Computer Equipment
Fixed plastic raceway should not prevent the movement of computer carts. Route permanent cables to a safe connection point, then use an appropriate flexible lead or managed service loop for the mobile section.
Avoid leaving excess cable on the floor or wrapping cords tightly around cart handles. The transition point should protect connectors while allowing the cart to reach its intended locations.
Adhesive and Mechanical Mounting Options
Mounting method affects holding strength, surface condition, removability, and installation time. Adhesive-backed raceway can be convenient, but mechanical fasteners may provide better support for long runs, larger profiles, or difficult surfaces.
When Adhesive-Backed Raceway Works Well
Adhesive-backed channels may suit smooth, clean, dry surfaces and light cable bundles. They can reduce drilling in finished offices and allow quick installation. Even so, paint quality, wall texture, dust, moisture, and temperature can weaken adhesion.
Prepare the surface exactly as the manufacturer directs. Dry-fit the route before removing the liner because repositioning may reduce bond strength. Also confirm that the adhesive is approved for the surface and expected load.
When Mechanical Fasteners Are Better
Screw-mounted raceway often makes sense for heavier bundles, long vertical runs, textured walls, high-contact areas, or installations that must remain secure for years. Use fasteners appropriate for the base material and the raceway’s mounting slots.
Before drilling, check for concealed wiring, plumbing, and other services. Do not assume drywall alone provides adequate support. When the wall construction is uncertain, consult a qualified installer.
Managing Corners, Joints and Cable Exits
A clean route depends on the fittings as much as the straight channel. Inside corners, outside corners, flat elbows, tees, couplers, end caps, and entrance fittings help the system follow walls and reach equipment without exposed gaps.
Whenever possible, use fittings from the same product family. Similar-looking components from different systems may not share the same cover shape, locking method, or internal dimensions. Mismatched parts can create loose joints and reduce usable capacity.
Plan cable exits where connectors can be reached without sharp bends. Keep enough clearance to remove the cover after furniture and equipment are installed. If a route turns around a cabinet, column, or door frame, dry-fit every transition before cutting the channel.
Small mounting accessories such as cable clips, grommets, ties, and brackets can guide the final transition between the raceway and the equipment. Use them to control movement without pinching or tightly clamping the cable jacket.
Follow the cable manufacturer’s bend guidance, especially for network, fiber, and display cables. A raceway fitting should create a smooth path rather than forcing the bundle through a tight corner.
How to Maintain or Modify a Raceway System
A plastic raceway system should remain accessible after installation. Routine inspection makes it easier to spot loose covers, separating adhesive, cracked fittings, overloaded sections, damaged cable jackets, and stretched connections before they create larger problems.
Inspect the Route After Workspace Changes
Review the raceway whenever furniture, displays, computers, or power locations change. Confirm that new equipment has not blocked a cover, reduced ventilation, or pulled a cable beyond its intended service loop.
Clean the exterior with a method compatible with the raceway material and surrounding environment. Avoid strong cleaners unless the manufacturer confirms compatibility because some chemicals can discolor or weaken plastic.
Add or Replace Cables Carefully
Open covers with the recommended tool or release method. Remove cables that are no longer used before adding new ones, and confirm that the updated bundle still fits without force. Replace damaged fittings rather than relying on tape or temporary patches.
If the new cable quantity exceeds the usable capacity, install a larger channel or a second planned route. Expanding the system correctly is usually easier to maintain than overfilling the original raceway.
Plan the Complete Route Before Ordering
Choosing a plastic cable raceway requires a complete view of the workspace. Start with the cable bundle and connector sizes. Then compare profile depth, fitting availability, mounting surface, equipment movement, and future access.
A well-planned system can improve organization, protect cables from routine contact, and make later changes easier. Most poor results come from undersized channels, rushed surface preparation, or routes that ignore corners and moving equipment.
For help planning surface cable management around desks, displays, carts, or wall-mounted equipment, contact a mounting specialist to review the cable path, mounting surface, movement requirements, and compatible components before ordering.
Frequently Asked Questions
What is a plastic cable raceway used for?
It organizes and conceals cables along walls, desks, or equipment while keeping the route accessible for inspection, maintenance, and future changes.
Can plastic cable raceway hold power and data cables together?
Only when the product is approved for that use and provides any required separation. Check the manufacturer’s instructions and applicable requirements.
How do I know what size plastic cable raceway I need?
Measure the full cable bundle and largest connectors, then compare them with the usable internal dimensions. Leave extra room for access and additions.
Is adhesive cable raceway strong enough for a wall?
It can work on clean, smooth, compatible surfaces with light bundles. Long runs, heavy cables, or textured walls may require mechanical fasteners.
Can a plastic cable raceway be painted?
Some products can be painted, but surface preparation and coating compatibility vary. Follow the raceway manufacturer’s finishing recommendations.