
Exposed cables can make an otherwise organized room look unfinished, create snag points, and complicate cleaning. Molding for wire provides a surface-mounted pathway that can conceal and organize cables when opening the wall is impractical. For buyers reviewing cable-management and mounting solutions, the right product should fit the cable type, route, wall surface, and installation environment.
The choice involves more than color and length. You also need to compare channel capacity, material, fittings, service separation, mounting method, and future access. A channel that is too small can crowd cables, while an oversized system may look bulky or interfere with nearby equipment.
This guide is written for homeowners, office managers, facility teams, IT professionals, workspace planners, low-voltage installers, and commercial buyers. It focuses on product selection and route planning. Line-voltage electrical work should follow the product listing, manufacturer instructions, local requirements, and any rules set by the authority having jurisdiction.
What Is Molding for Wire?
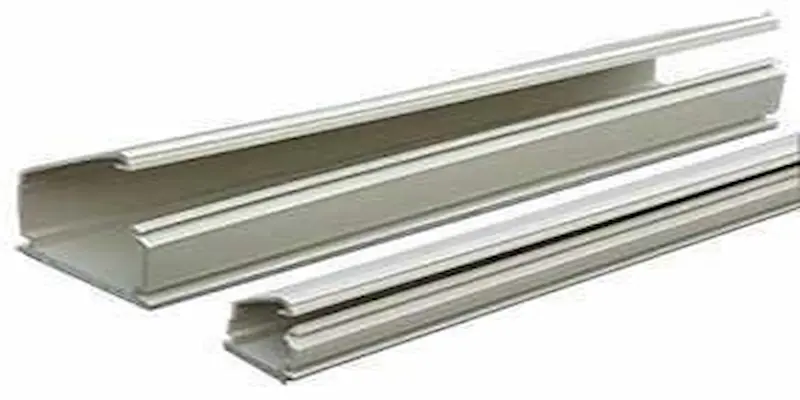
Wire molding is a surface-mounted channel that routes cables along a wall, baseboard, ceiling edge, desk, or other finished surface. Many products use a base that fastens to the surface and a removable or snap-on cover that closes over the cables.
The terms wire management molding, cable molding covers, cable raceway, and surface wire channel are often used for related products. However, they are not always interchangeable. A decorative cord cover may be intended only for communication or low-voltage cables, while a listed surface raceway may be designed for specific electrical conductors and fittings.
Always confirm the product’s intended use before installing it. The label, specification sheet, and installation manual should identify compatible cable types, environmental limits, fittings, and fastening methods. Do not assume that every plastic channel can carry building wiring or that every metal channel supports mixed services.
When Should Wire Molding Be Used?
Wire molding is useful when a cable route must remain accessible or when cutting into finished walls would add unnecessary disruption. It can support renovations, office reconfigurations, equipment upgrades, temporary layouts, and locations with masonry or other difficult-to-open surfaces.
Common applications include routing cables to displays, cameras, communication devices, workstations, controls, or wall-mounted computers. When planning around complete wall-mounted systems, the cable path should support the equipment position without blocking adjustment, maintenance, or ventilation.
A surface channel may not be the right choice in wet, corrosive, high-heat, outdoor, or high-impact locations unless the product is specifically rated for that environment. It also should not cover damaged wiring, overloaded cords, loose connections, or other hazards. Correct the underlying issue first.
Common Types of Wire and Cable Molding
The best channel depends on the cable service, capacity, exposure, and appearance required. The following categories provide a practical starting point.
Low-profile cord cover. Typical use: A small group of communication, AV, or device cords. Key check: Confirm cable type and whether the cover can be reopened
Single-channel raceway. Typical use: One service routed along a simple wall path. Key check: Match the channel and fittings to the intended wiring method
Multi-channel raceway. Typical use: Power and communications that require organized separation. Key check: Use only the barriers and service arrangements approved for the system
Heavy-duty metal channel. Typical use: Commercial or industrial areas with greater physical exposure.
Key check: Review grounding, bonding, cutting, and fastening requirements
Fittings matter as much as the straight channel. Plan inside corners, outside corners, flat elbows, tees, end caps, transitions, and device boxes before ordering. Compatible mounting accessories can also help coordinate nearby equipment supports and cable-management components.
How to Choose the Correct Channel Size
Start by listing every cable that will enter the channel. Record the cable diameter, connector size, quantity, bend requirements, and whether each cable belongs to power, data, AV, control, or another service. Large connectors may determine the required opening even when the cable itself is thin.
Allow Space for Installation and Access
A channel should not force cables into a tightly packed bundle. Leave enough room to place the cables without crushing jackets, creating sharp bends, or making the cover difficult to close. Follow any capacity or fill limits provided by the manufacturer and applicable code.
Plan for Service Separation
Power and communication cables may need separation, barriers, or different pathways. Use a system approved for the intended combination rather than adding an improvised divider. When requirements are unclear, ask the manufacturer, designer, electrician, or local authority before installation.
Consider Future Changes
A small amount of planned spare capacity can simplify a later equipment change. Still, avoid choosing a channel so large that it dominates the wall or creates unnecessary projections. Balance future flexibility with the actual route and room design.
Plastic Versus Metal Wire Molding
Plastic and metal systems can both create an orderly cable path, but they serve different priorities. The correct material depends on the listed use, physical exposure, appearance, installation method, and facility requirements.
Plastic Wire Molding
Plastic molding is often selected for offices, homes, classrooms, and light-duty communication routes because it is relatively easy to cut and can offer a low-profile appearance. Some products accept paint, but only when the manufacturer permits it and the coating does not interfere with covers, labels, or fittings.
Plastic does not automatically mean low voltage, and it does not automatically mean suitable for power. Check the exact product listing and instructions.
Metal Wire Molding
Metal molding can provide greater resistance to impact and may suit commercial, institutional, or industrial locations. It may also be chosen where the design calls for a durable exposed raceway. Cutting edges must be finished correctly, and any grounding or bonding steps must follow the system instructions and applicable electrical requirements.
Choose the material after reviewing the complete application rather than relying on appearance alone. Also confirm that corners, boxes, couplings, and transitions are available in the same system.
How to Plan a Wire-Molding Route
A successful route should be direct, accessible, and coordinated with the equipment. Begin at the cable source and trace the path to every device. Straight horizontal and vertical runs usually look cleaner and make fittings easier to plan.
Map Obstacles and Connection Points
Mark doors, cabinets, windows, outlets, wall joints, displays, work surfaces, and service panels. Keep covers accessible so cables can be inspected or changed. Avoid placing a channel where furniture, carts, or equipment will repeatedly strike it.
Plan Around Moving Equipment
Cables serving adjustable monitor arms need enough controlled slack for the full range of motion. The fixed surface wire channel should end before the moving section, followed by an approved flexible cable-management method.
Similarly, route cables near track mounting systems so the channel does not block horizontal adjustment, removal points, or hardware access. Test the complete travel path before fastening the final fittings.
For office standing desks, keep the rigid channel on the fixed wall or furniture section. Provide suitable cable movement between the fixed route and the height-adjustable surface without stretching or pinching cords.
Dry-Plan Before Cutting
Measure each straight section and count every fitting. Place removable tape along the proposed route, then check sightlines, cover access, connector clearance, and cable entry direction. This quick mock-up can prevent awkward bends and unnecessary joints.
Wire Molding Installation Steps
Installation details vary by system, so the manufacturer’s instructions take priority. The sequence below provides a general planning framework for appropriate low-voltage or communications applications. Hire a qualified electrician for line-voltage work or whenever local rules require one.
Safety note: Do not use decorative cord covers as a substitute for an approved wiring method. Verify the product, cable type, location, and local requirements before work begins.
- Confirm the application. Verify the cable service, channel rating, material, capacity, fittings, and environmental suitability.
- Inspect the route. Check the surface condition and locate concealed wiring, plumbing, or other hazards before drilling or fastening.
- Lay out the path. Mark straight reference lines and the positions of corners, boxes, transitions, and cable entry points.
- Dry-fit the system. Place the base sections and fittings without final fastening to confirm lengths, alignment, and cover access.
- Cut and prepare components. Use the manufacturer-recommended tools, make square cuts, and remove burrs or sharp edges.
- Fasten the base. Use the approved spacing, screws, anchors, or adhesive method for the surface and product. Do not rely on adhesive where mechanical fastening is required.
- Place and organize the cables. Maintain bend limits, avoid crushing or twisting, and preserve required separation between services.
- Install covers and fittings. Close every section fully, confirm that joints align, and ensure no cable is trapped between the base and cover.
- Test and inspect. Verify device operation, check cable movement, and confirm that the complete route remains secure and accessible.
After installation, label complex routes when appropriate and keep product information available for future changes. Reinspect the channel if equipment moves, a cover becomes loose, or cables show damage.
Choose a Complete Cable Path, Not Just a Cover
The right molding for wire should match the cables, channel capacity, service requirements, wall surface, equipment movement, and room conditions. Start with a cable inventory, select compatible fittings, and map the entire route before ordering.
Next, compare plastic and metal options based on the actual application. Finally, follow the product instructions and use qualified electrical help whenever the installation involves line voltage, code questions, or uncertain site conditions.
A carefully planned surface channel can create a cleaner, more accessible installation without unnecessary wall disruption. For help coordinating cable routes with equipment mounts and workspace hardware, contact a mounting specialist to discuss your layout and application requirements.
Frequently Asked Questions
What is molding for wire used for?
It creates a surface-mounted path that conceals, organizes, and protects compatible cables along finished walls, desks, or equipment areas.
Can wire molding hide electrical cords?
Some products can cover device cords, while listed raceways may support specific wiring methods. Always verify the product rating and local requirements.
Is plastic or metal wire molding better?
Plastic often suits light-duty interior routes, while metal may offer greater impact resistance. Choose according to the listed use and environment.
How do I choose the correct wire molding size?
Count every cable, check connector dimensions, preserve bend space, and follow the manufacturer’s capacity limits and service-separation guidance.
Can cable molding covers be painted?
Some covers may be painted with an approved coating. Check the manufacturer’s instructions so paint does not affect fit, labels, or cover removal.